Greybishop's Chess Set
An area to update those interested in my progress as I build a custom "Marvel Vs. DC" Chess Set. Enjoy!
About Me

- Name: Greybishop
- Location: Ontario, Canada
An old guy who you would find boring. Special skills include: Ability to eat a whole pizza in a single sitting, regardless of size; Amazing taste in comic book related apparel; My cleverest moments invariably occur when there's no audience.
Tuesday, January 30, 2007
Monday, January 29, 2007
So, a diaper just isn't a good look for Ben.
I decided that the grey diaper look just wasn't working for me and added a little blue to the Thing's outfit. Still two more layers of blue (at least) to go before I'm done.
As usual, I've provided 4 views, each with the flash on and off to give detail and as "true" colour comparisons as possible. I don't think we need to label the individual pictures this time 'round.


As usual, I've provided 4 views, each with the flash on and off to give detail and as "true" colour comparisons as possible. I don't think we need to label the individual pictures this time 'round.


Could you please put some PANTS on?
So I'm looking at the Thing and I can say that his body is very close (Perhaps one or two more layers of paint) to finished. But the big guy still hasn't got his pants on. Paint layer #6 to the rescue. Porcelain Blue to be exact. Brushed over the black base to help brighten up the "speedo" area and provide a darker under colour for the (eventually) white belt.
Right side, flash off.

Right side, flash on.

Left side, flash off.

Left side, flash on.

Since I had the porcelain blue out, I decided to give the Hulk his second layer of colour. Normally, I'd finish the body/legs first and then attack the pants separately, but since he's so "open" (no serious cramped spaces to work in - see the Thing's left hand where it meets his "speedo" for an example of what I mean) I'm comfortable working in more than one colour set at a time on this figure.
The porcelain blue lightens up the area for the purple pants I'm going to put him in. Any of the lighter under colour that ends up showing through will appear as a wear spot in the fabric, compimenting the illusion.
Front, flash off.

Front, flash on.

Rear, flash off.

Rear, flash on.

Right side, flash off.

Right side, flash on.

Left side, flash off.

Left side, flash on.

Since I had the porcelain blue out, I decided to give the Hulk his second layer of colour. Normally, I'd finish the body/legs first and then attack the pants separately, but since he's so "open" (no serious cramped spaces to work in - see the Thing's left hand where it meets his "speedo" for an example of what I mean) I'm comfortable working in more than one colour set at a time on this figure.
The porcelain blue lightens up the area for the purple pants I'm going to put him in. Any of the lighter under colour that ends up showing through will appear as a wear spot in the fabric, compimenting the illusion.
Front, flash off.

Front, flash on.

Rear, flash off.

Rear, flash on.

Sunday, January 28, 2007
Progress being made.
To give an idea of the progress I'm making, here are the 6 stages of the Thing miniature. To date I've applied 5 layers of paint to him. By showing them in sequence, I hope to give you an idea of how the process works.
Despite being very happy with my new camera, there are still minor inconsitencies in the lighting, so the colour isn't 100%. When I'm finished, each figure will get an "official portrait" with more carefully arranged lighting to reflect the colours more correctly.
Stage Zero. Naked...er, unpainted.

Stage One.
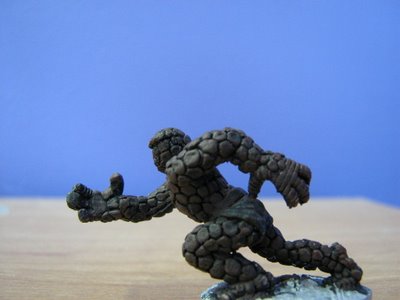
Primed in black.

Stage Two.
First colour, dark brown. Flash off.

Stage Two.
First colour, dark brown. Flash on.

Stage Three.
Second colour, medium orange mixed 5:1 with dark brown, flash off.

Stage Three.
Second colour, medium orange mixed 5:1 with dark brown, flash on.

Stage Four.
Third colour, medium orange, flash off.

Stage Four.
Third colour, medium orange, flash on.

Stage Five.
Fourth colour, medium orange mixed 5:2 with white, flash off.

Stage Five.
Fourth colour, medium orange mixed 5:2 with white, flash on.

Stage Six.
Fifth colour, medium orange mixed 1:1 with white, applied to "lit" areas only, flash off.

Stage Six.
Fifth colour, medium orange mixed 1:1 with white, applied to "lit" areas only, flash on.

Despite being very happy with my new camera, there are still minor inconsitencies in the lighting, so the colour isn't 100%. When I'm finished, each figure will get an "official portrait" with more carefully arranged lighting to reflect the colours more correctly.
Stage Zero. Naked...er, unpainted.

Stage One.
Primed in black.

Stage Two.
First colour, dark brown. Flash off.

Stage Two.
First colour, dark brown. Flash on.

Stage Three.
Second colour, medium orange mixed 5:1 with dark brown, flash off.

Stage Three.
Second colour, medium orange mixed 5:1 with dark brown, flash on.

Stage Four.
Third colour, medium orange, flash off.

Stage Four.
Third colour, medium orange, flash on.

Stage Five.
Fourth colour, medium orange mixed 5:2 with white, flash off.

Stage Five.
Fourth colour, medium orange mixed 5:2 with white, flash on.

Stage Six.
Fifth colour, medium orange mixed 1:1 with white, applied to "lit" areas only, flash off.

Stage Six.
Fifth colour, medium orange mixed 1:1 with white, applied to "lit" areas only, flash on.


